

How To Register A Unifi Ap Controller Software
Recently I replaced my wireless router, an Asus RT-AC66U, with an Ubiquiti EdgeRouter X router and Ubiquiti UAP-AC-LR access point. Both of which are a HUGE footstep up over traditional consumer wireless routers.
The Ubiquiti access points use software called the Ubiquiti UniFi controller to configure and command the access points which tin can be installed locally or in the cloud – allowing yous to manage the admission points no matter where they are located.
To automate the install process, I created a simple script to deploy the Ubiquiti UniFi Controller in the cloud on a Ubuntu server, and have too tested the script on three popular VPS providers: Linode, Vultr, and DigitalOcean – all three worked perfectly!
Linode would be my start choice every bit they offer the best functioning and with 1CPU and 2GB RAM you'll have more than than enough of resources to run Ubiquiti UniFi Controller and manage many sites and access points.
If you have a small-scale deployment, Vultr would hands be my choice with 1CPU and 768MB RAM! All three providers likewise cost less than AWS and Azure.
For my deployment I went with Linode every bit I plan on using it to control not just my abode access points simply to command the access points of customers and family besides.
Lets begin…
Create a cloud server for the UniFi Controller
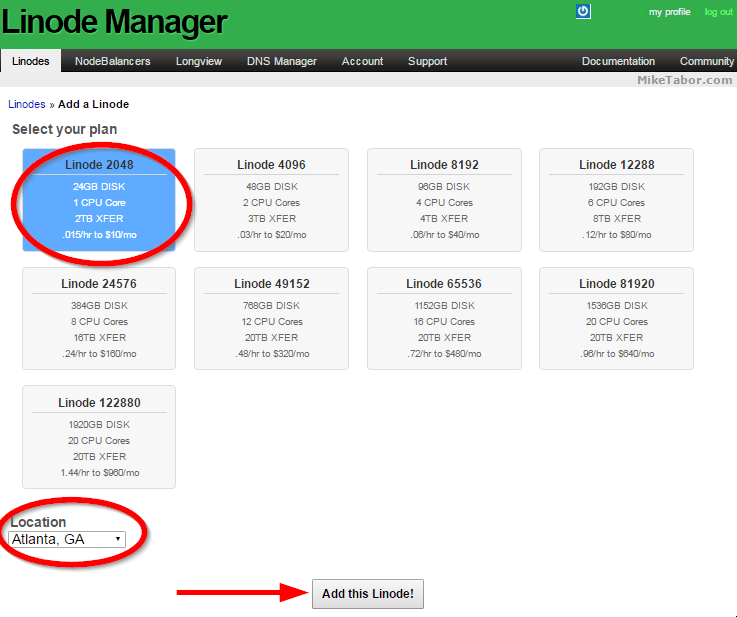
- First step is to create your Linode node and to do so simply select your node size and location and click on "Add this Linode!".
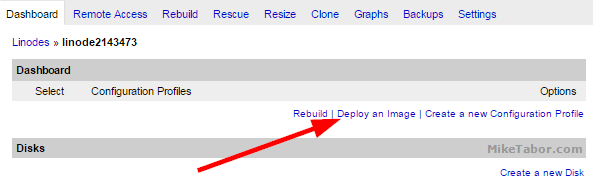
- Next click on "Dashboard".

- We demand to deploy an operating system on our new node so click on "Deploy an Image".
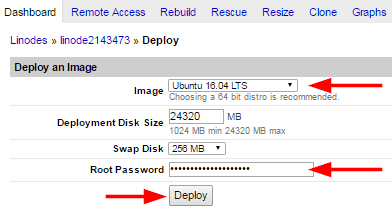
- For prototype type select "Ubuntu 16.04 LTS" and set your root password and so click on "Deploy".
- Wait until the three Host Job Queues are complete (initial config, disk create, and file organization create) and and so click on "Boot".
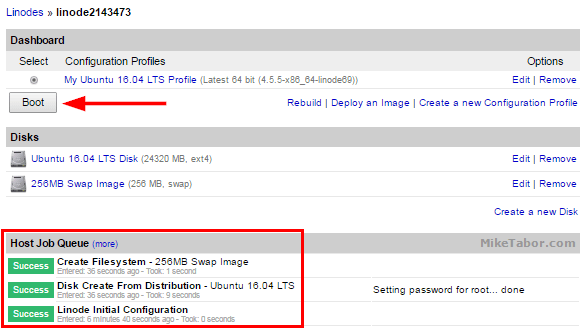
Your new node is now built and ready to have the Ubiquiti UniFi controller installed onto it.
Install Ubiquiti UniFi Controller on Ubuntu
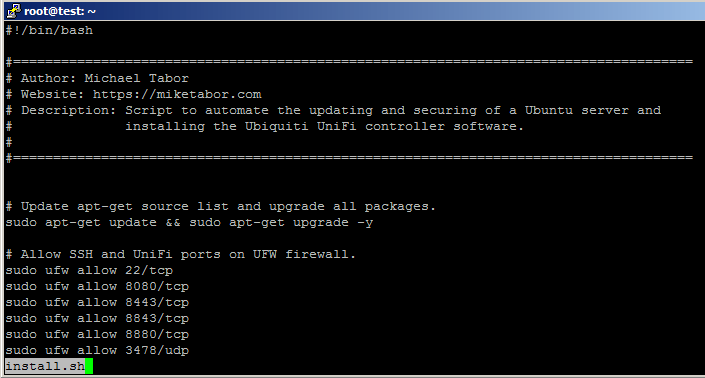
While the Ubiquiti UniFi controller install process is pretty easy, I've tried to brand the process even easier by scripting information technology. Information technology's now as simple as running one single control.
The script is hosted on GitHub (unifi-autoinstall) and I strongly urge anybody to view the source and inspect information technology earlier running it as it'south never good practice to blindly run scripts. So with that lets become started…
- SSH into your new Linode node using PuTTy or Terminal and type the following command and printing Enter to download the script to your server.
wget https://raw.githubusercontent.com/miketabor/unifi-autoinstall/master/install.sh
- Next lets view the script to meet what it does past typing the post-obit:
less install.sh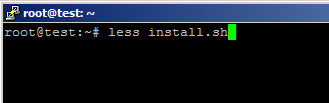
- You can at present view the contents of the UniFi autoinstall script, install.sh. Once y'all've viewed it you can printing q to leave and continue on.
- Now lets actually run the script. Blazon the post-obit to start the script to car configure the firewall, Fail2ban and install the Ubiquiti UniFi Controller.
sudo bash install.sh
- When the script finishes, typically less than ane minute, you'll run across a message letting you know information technology's finished and to log into your new UniFi controller by going to: https://<SERVER_IP>:8443
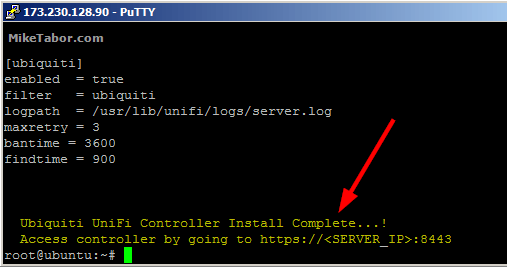
That's it! The Ubiquiti UniFi Controller is at present ready to for use. Now go ahead and go to https://<SERVER_IP>:8443 and cease the UniFi Controller wizard. Finally, beefore nosotros motion on to far I wanted to speedily explain what exactly the script is doing.
- Get-go it updates all the packages on Ubuntu.
- Configures UFW to allow but SSH and the needed Ubiquiti UniFi ports (per ubiquiti documentation)
- Installs latest version five UniFi controller and its dependencies.
- Finally installs Fail2Ban and configures it to protect SSH (default) likewise as the UniFi login page!
Now lets discover and register the new access points to the UniFi controller.
How to register access points to UniFi controller in the cloud
The last pace is to register the admission point(s) with the UniFi Controller on the deject, in this case Linode.
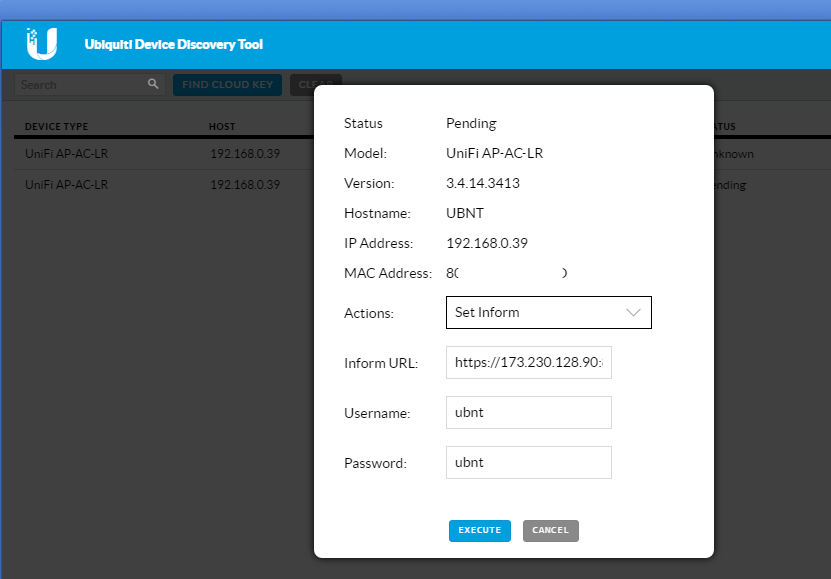
- Open the Ubiquiti Discovery Tool or use the Ubiquiti Chrome extension.
- Typically right away the discovery tool will observe all the admission points on your local network. Side by side to the one you desire to register with the UniFi controller click on "Action".
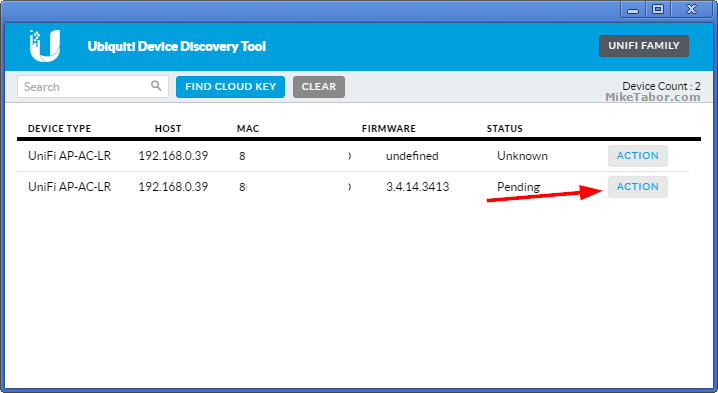
- In the Actions drop down fix to "Prepare Inform" and modify the Inform URL to: https://<UniFi_Server_IP–OR–FQDN>:8080/inform
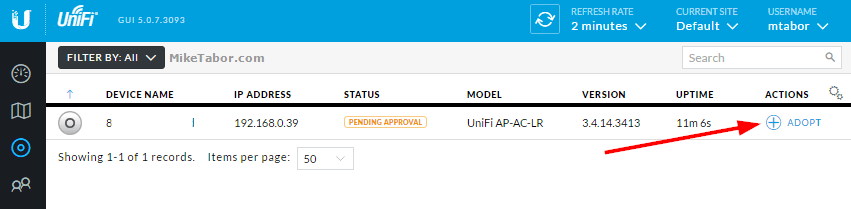
- Now go to your UniFi Controller and the Ubiquiti access point should exist listed and awaiting your activity. Click on Adopt.
That'southward it! That completes setting upwards a Ubiquiti UniFi controller in the cloud and registering your admission point with the new UniFi controller. The merely steps left would be to setup your SSID, policies, additional sites, and so on.
Hope this helps and relish!
Lets hear from you
Got an idea how to make this process even better, share your thoughts below in the comments!

Source: https://miketabor.com/install-ubiquiti-unifi-controller-cloud/
Posted by: dickenaticeyound.blogspot.com
0 Response to "How To Register A Unifi Ap Controller Software"
Post a Comment